Witchy Whimsy Hat Kit
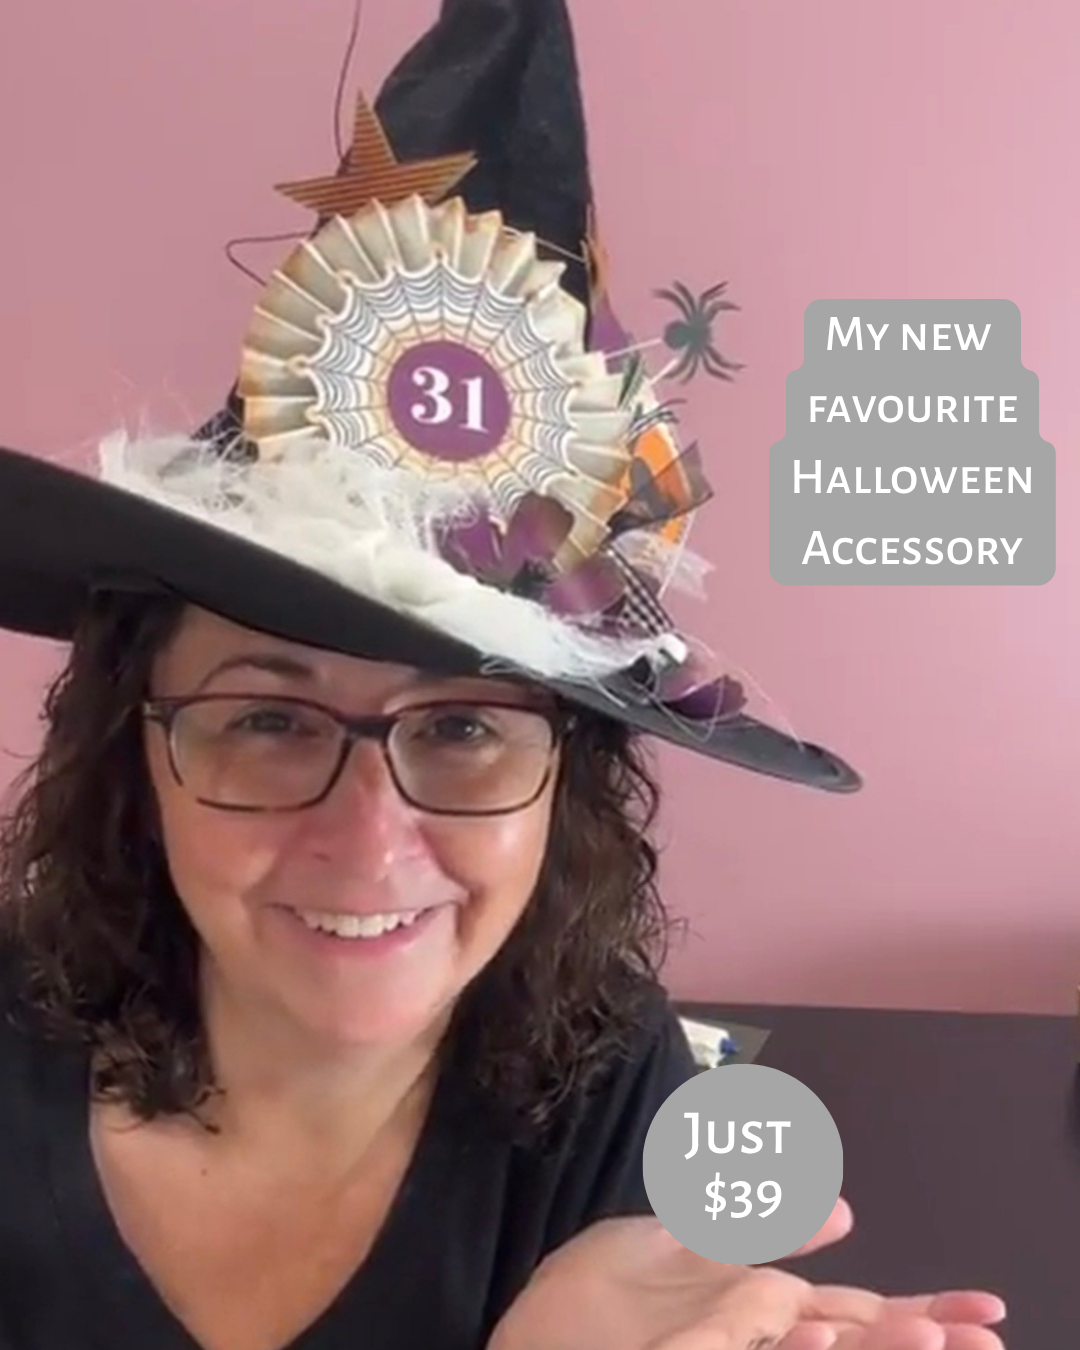
Sometimes card making gets a little…meh. There, I said it. I love making cards, but every once in a while it’s fun to put down the card bases and make something completely different — like a whimsical witch hat covered in flowers, spiders, stars, copper wire and one deeply suspicious eyeball.
The Witchy Whimsy Hat Kit by Stampin’ Up! was exactly the creative palate cleanser I needed.
What’s in the Kit
The hat arrives folded inside the kit and pops open into its full shape. Then you get to decorate it with all sorts of spooky little details, including:
- Paper flowers
- Accordion-fold decorations
- Stars and spiders
- A wonderfully creepy eyeball
- Copper wire
- Ribbon and wispy fabric
- Gold colouring medium
- Adhesive pieces
- Step-by-step instructions
You’ll also need a hot glue gun. A silicone craft mat is helpful, but not essential — the cardboard from the kit, a piece of newspaper, or any protected work surface will do.
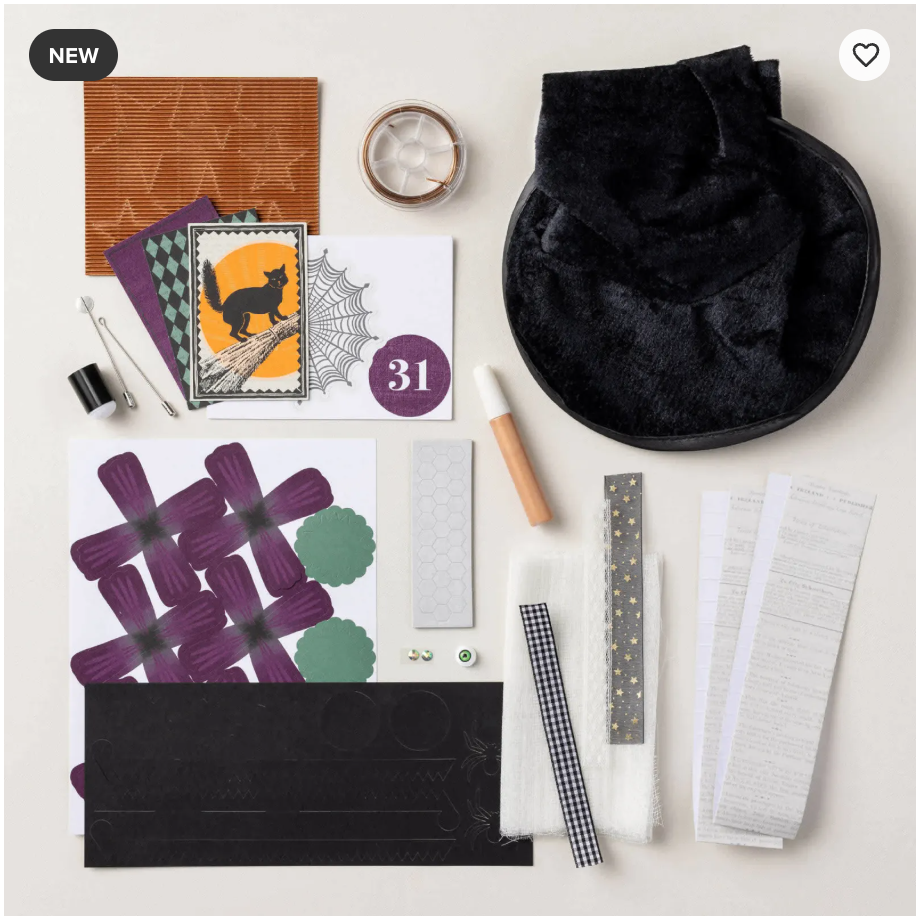 Contents of the Witchy Whimsy Hat Kit
You Don’t Need to Know What You’re Doing Before You Begin
I had never assembled this hat before the Live. We followed the instructions, figured out a few things as we went, briefly lost one of the flower pieces on the floor, and corrected an accordion fold that I had glued backwards. In other words, it was a normal day in the craft room.
That’s one of the things I love about a coordinated kit. The big decisions have already been made for you. The pieces work together, the project has a clear starting point, and the instructions walk you through the process. You still get to make creative choices — where to place the flowers, how to shape the copper wire, whether your spider needs a little gold — but you aren’t staring at a pile of supplies wondering how to begin.
▶ Watch the full tutorial on YouTube
In the full tutorial, I walk you through the assembly process — the flower centres, the accordion decoration, the copper wire, and the final “put it on your head” reveal. There are also a few real-life crafting moments along the way, because sometimes the best instructions include seeing what not to do the first time.
Five Tips for Assembling the Witchy Whimsy Hat Kit
Choose the Front of the Hat Before Attaching Anything
There is a seam running up the back of the hat. Find it first and decide which side will face forward before you begin gluing your decorations in place. Once the hot glue comes out, commitment happens quickly.
Don’t Roll the Flower Centres Too Tightly
I made mine a little too snug, which made them harder to fan out. Let the rolled pieces be approximately as wide as their circular bases — this gives you fuller flower centres and makes it easier to tuck in the creepy eyeball.
Dry-Fit the Large Pieces First
Before reaching for the hot glue, arrange the main embellishments on the hat. Place the large accordion decoration and flowers where you think you want them, then step back and have a look. It’s much easier to move something before it’s covered in hot glue. Ask me how I know.
Check the Direction of the Accordion Folds
When joining the two accordion strips, attach a printed side to a non-printed side — this helps the completed piece fold naturally into a circle. If you glue it incorrectly, don’t panic. Carefully separate the pieces and try again. Crafting confidence isn’t about never making mistakes. It’s knowing that most mistakes can be fixed.
Shape the Copper Wire at the End
Anchor the copper wire in a few places, but don’t fuss over its final shape too early. Once the main decorations and stars are attached, you can bend and adjust the wire until everything sits exactly where you want it.
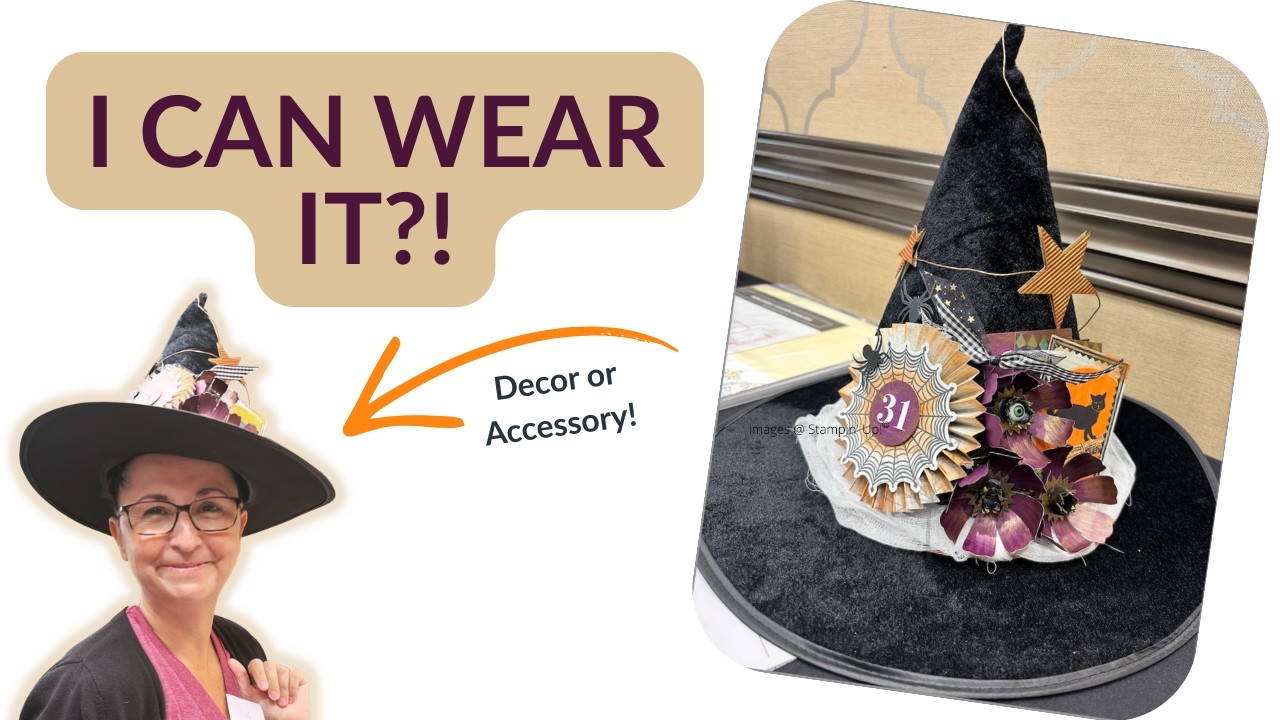
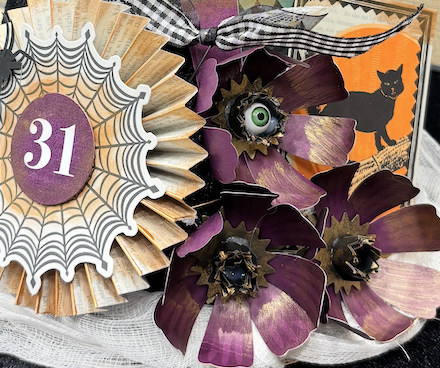 A closer look at the flowers, accordion decoration and copper-wire stars
Make It a Halloween Craft Night
The Witchy Whimsy Hat Kit would be such a fun project to make with girlfriends, coworkers, older kids, or grandchildren. Order a few kits, add snacks and a little “potion,” then hold a witch hat craft-off. Everyone begins with the same coordinated kit, but I guarantee the finished hats will each have their own personality.
You could wear yours:
- While handing out Halloween candy
- To work or a Halloween party
- At a fall crafting event
- During a very dramatic trip to the grocery store
- Anywhere you feel like causing a small, crafty scene
When Halloween is over, tuck your hat away and bring it out again next year. Mine has absolutely earned a place in the permanent collection.
Ready to Make Your Own Witchy Whimsy Hat?
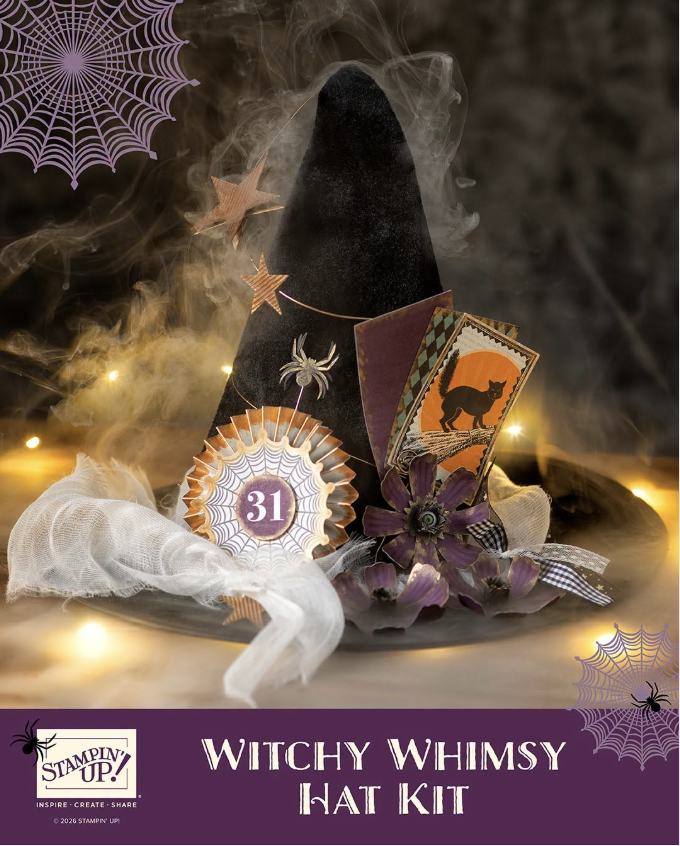
If you want a creative Halloween project without choosing and coordinating every little piece yourself, this kit gives you a clear plan while leaving room to make the finished hat your own. It was $39 CAD at the time of this Live — please check the shop for current Canadian pricing and availability.
Local to Victoria, BC?
Ask me about local pickup, group shipping, or organizing a Halloween craft night of your own. Bring your friends. We’ll make hats and cause a scene.
Want More Fun, Coordinated Projects Like This?
The Sunday newsletter is where I share what I’m making, upcoming classes, and the occasional detour from card making — like this hat. No pressure, just the next useful thing.
Join the Newsletter →Happy crafting!
Tanya — The Canadian Stamper
Create. Connect. Share.
August 16, 2026